> ## Documentation Index
> Fetch the complete documentation index at: https://doc.callupgrade.ai/llms.txt
> Use this file to discover all available pages before exploring further.
# White Label Setup
> Step-by-step guide for setting up your white labeled platform
Follow these steps to configure your white label platform:
## 1. Activate White Label
1. Purchase the white label plan
2. Wait for activation confirmation
3. Access your dashboard
## 2. Access White Label Panel
1. Look for the "White Label Panel" button in your dashboard
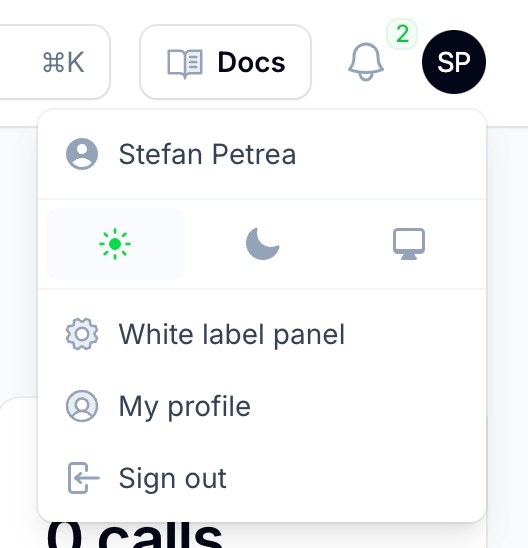 2. Click to access white label settings
## 3. Configure Platform Settings
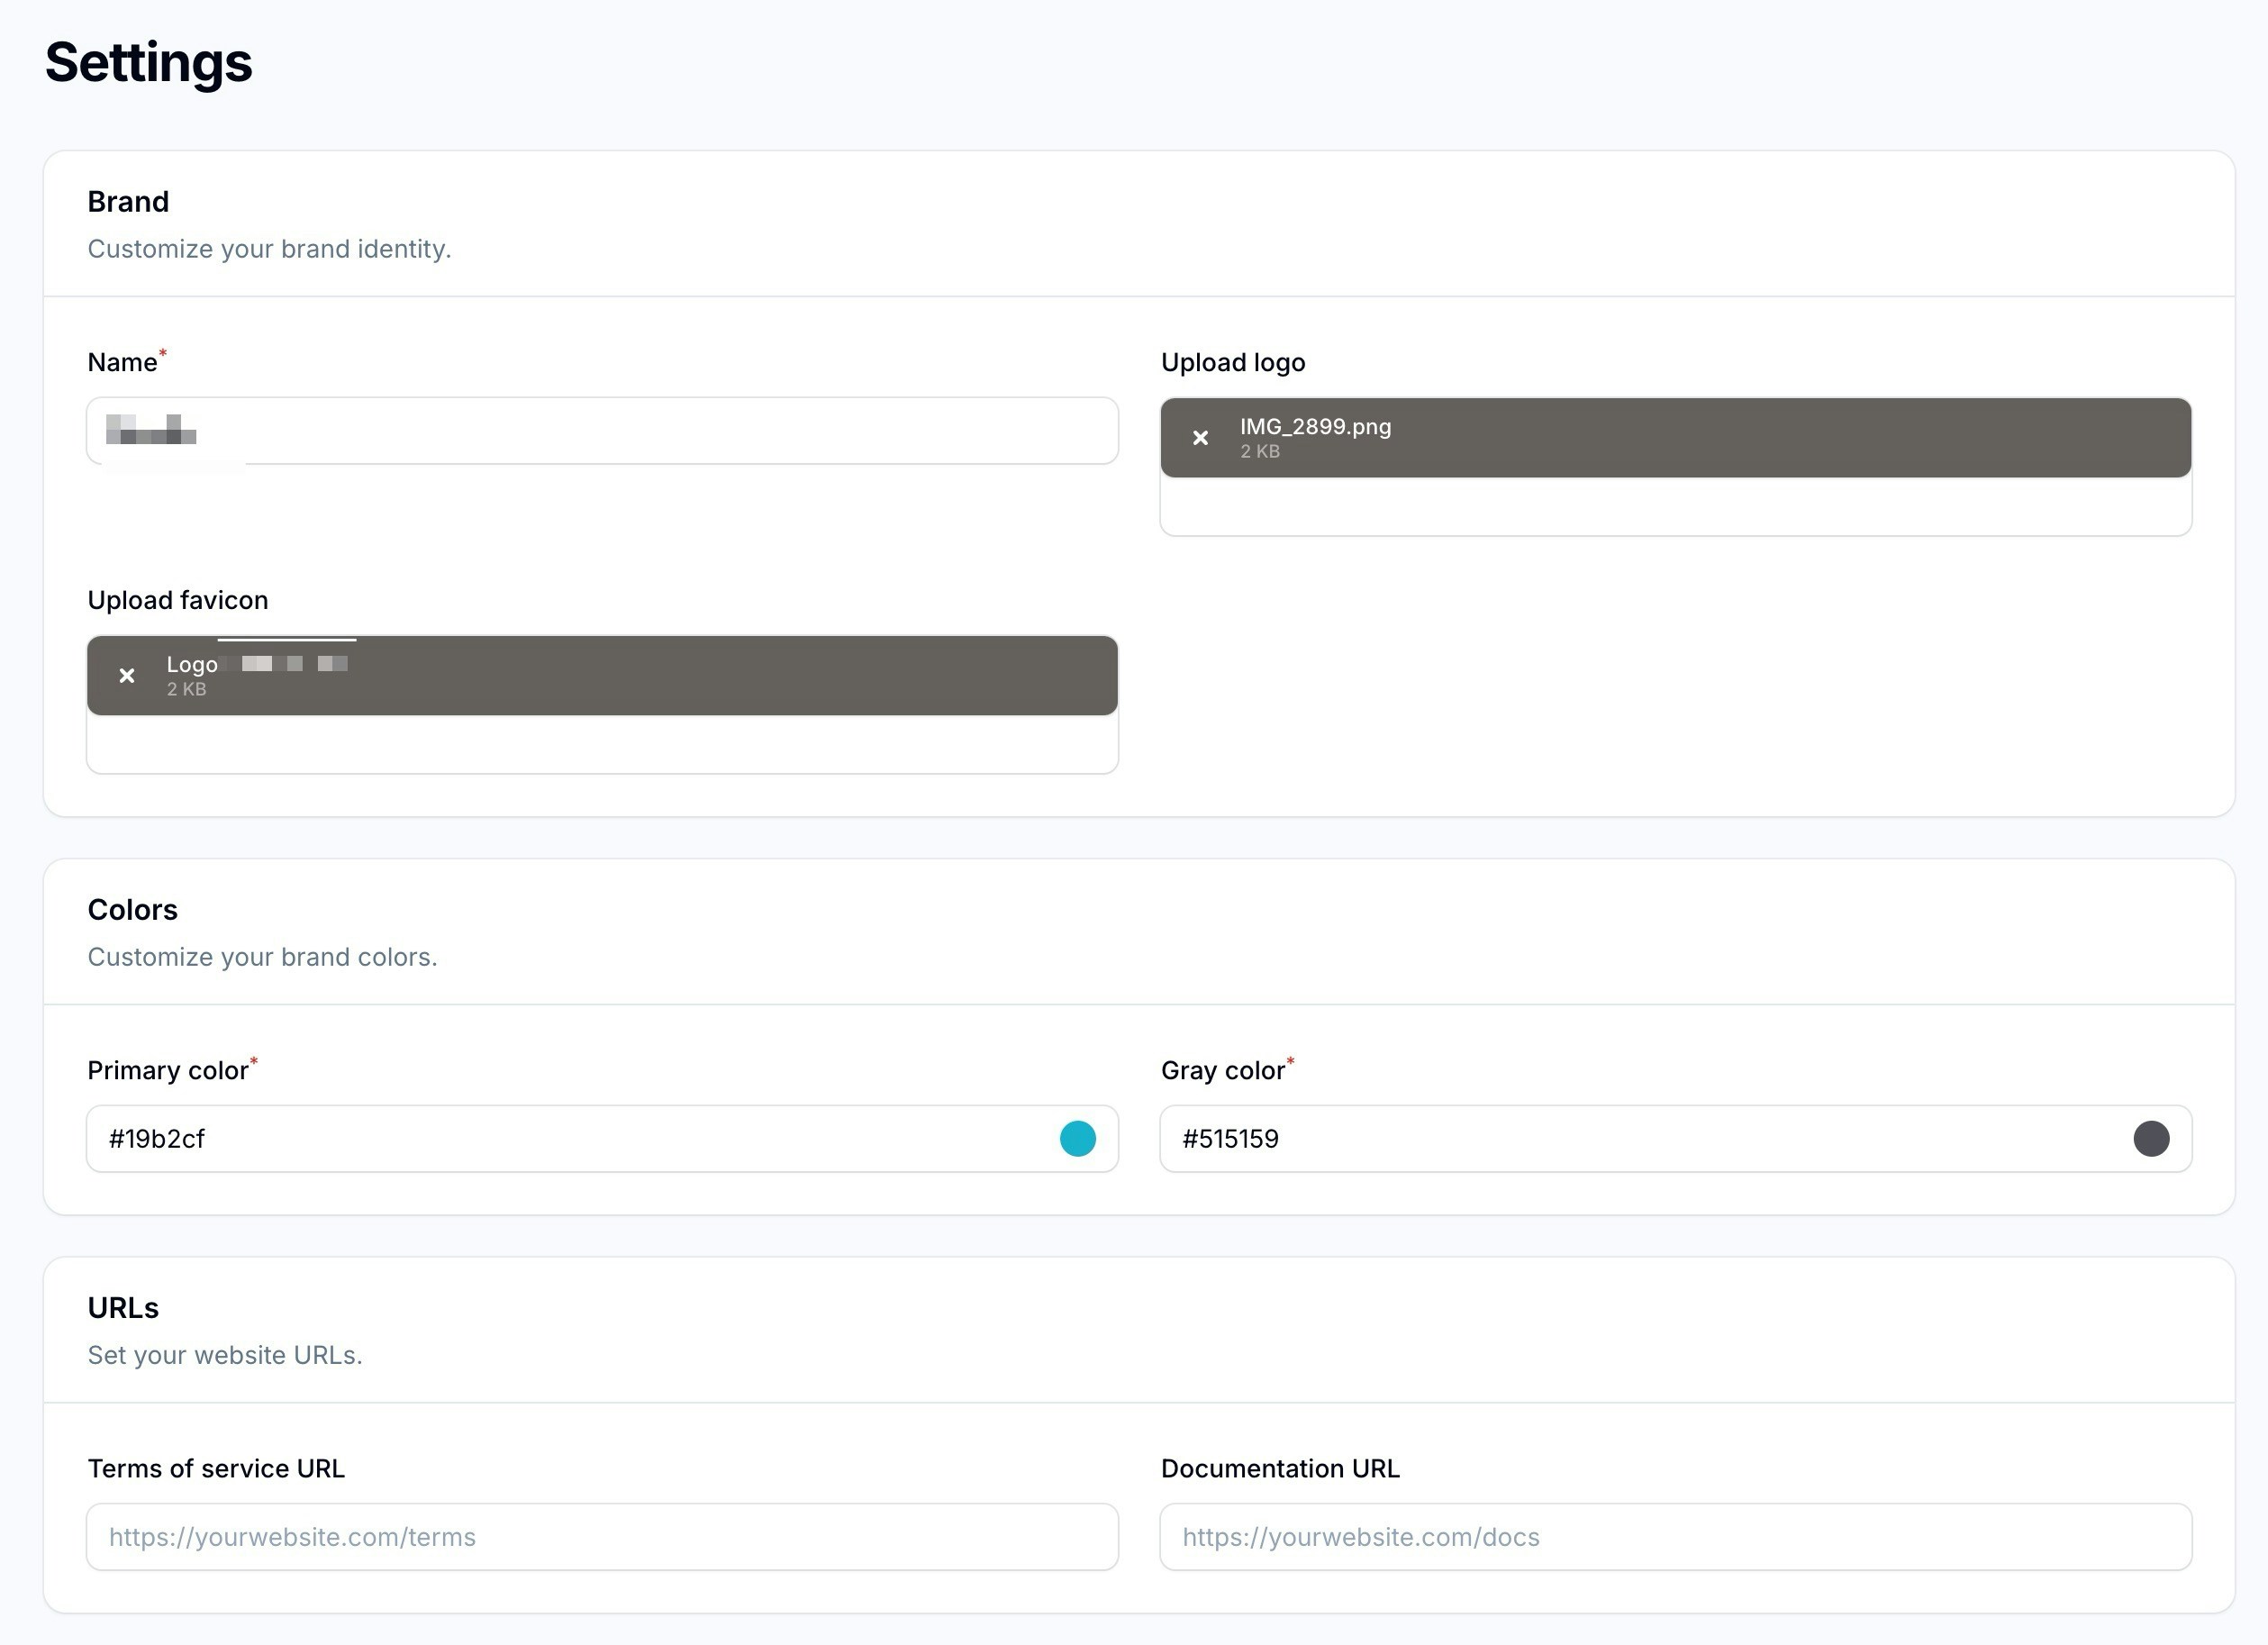
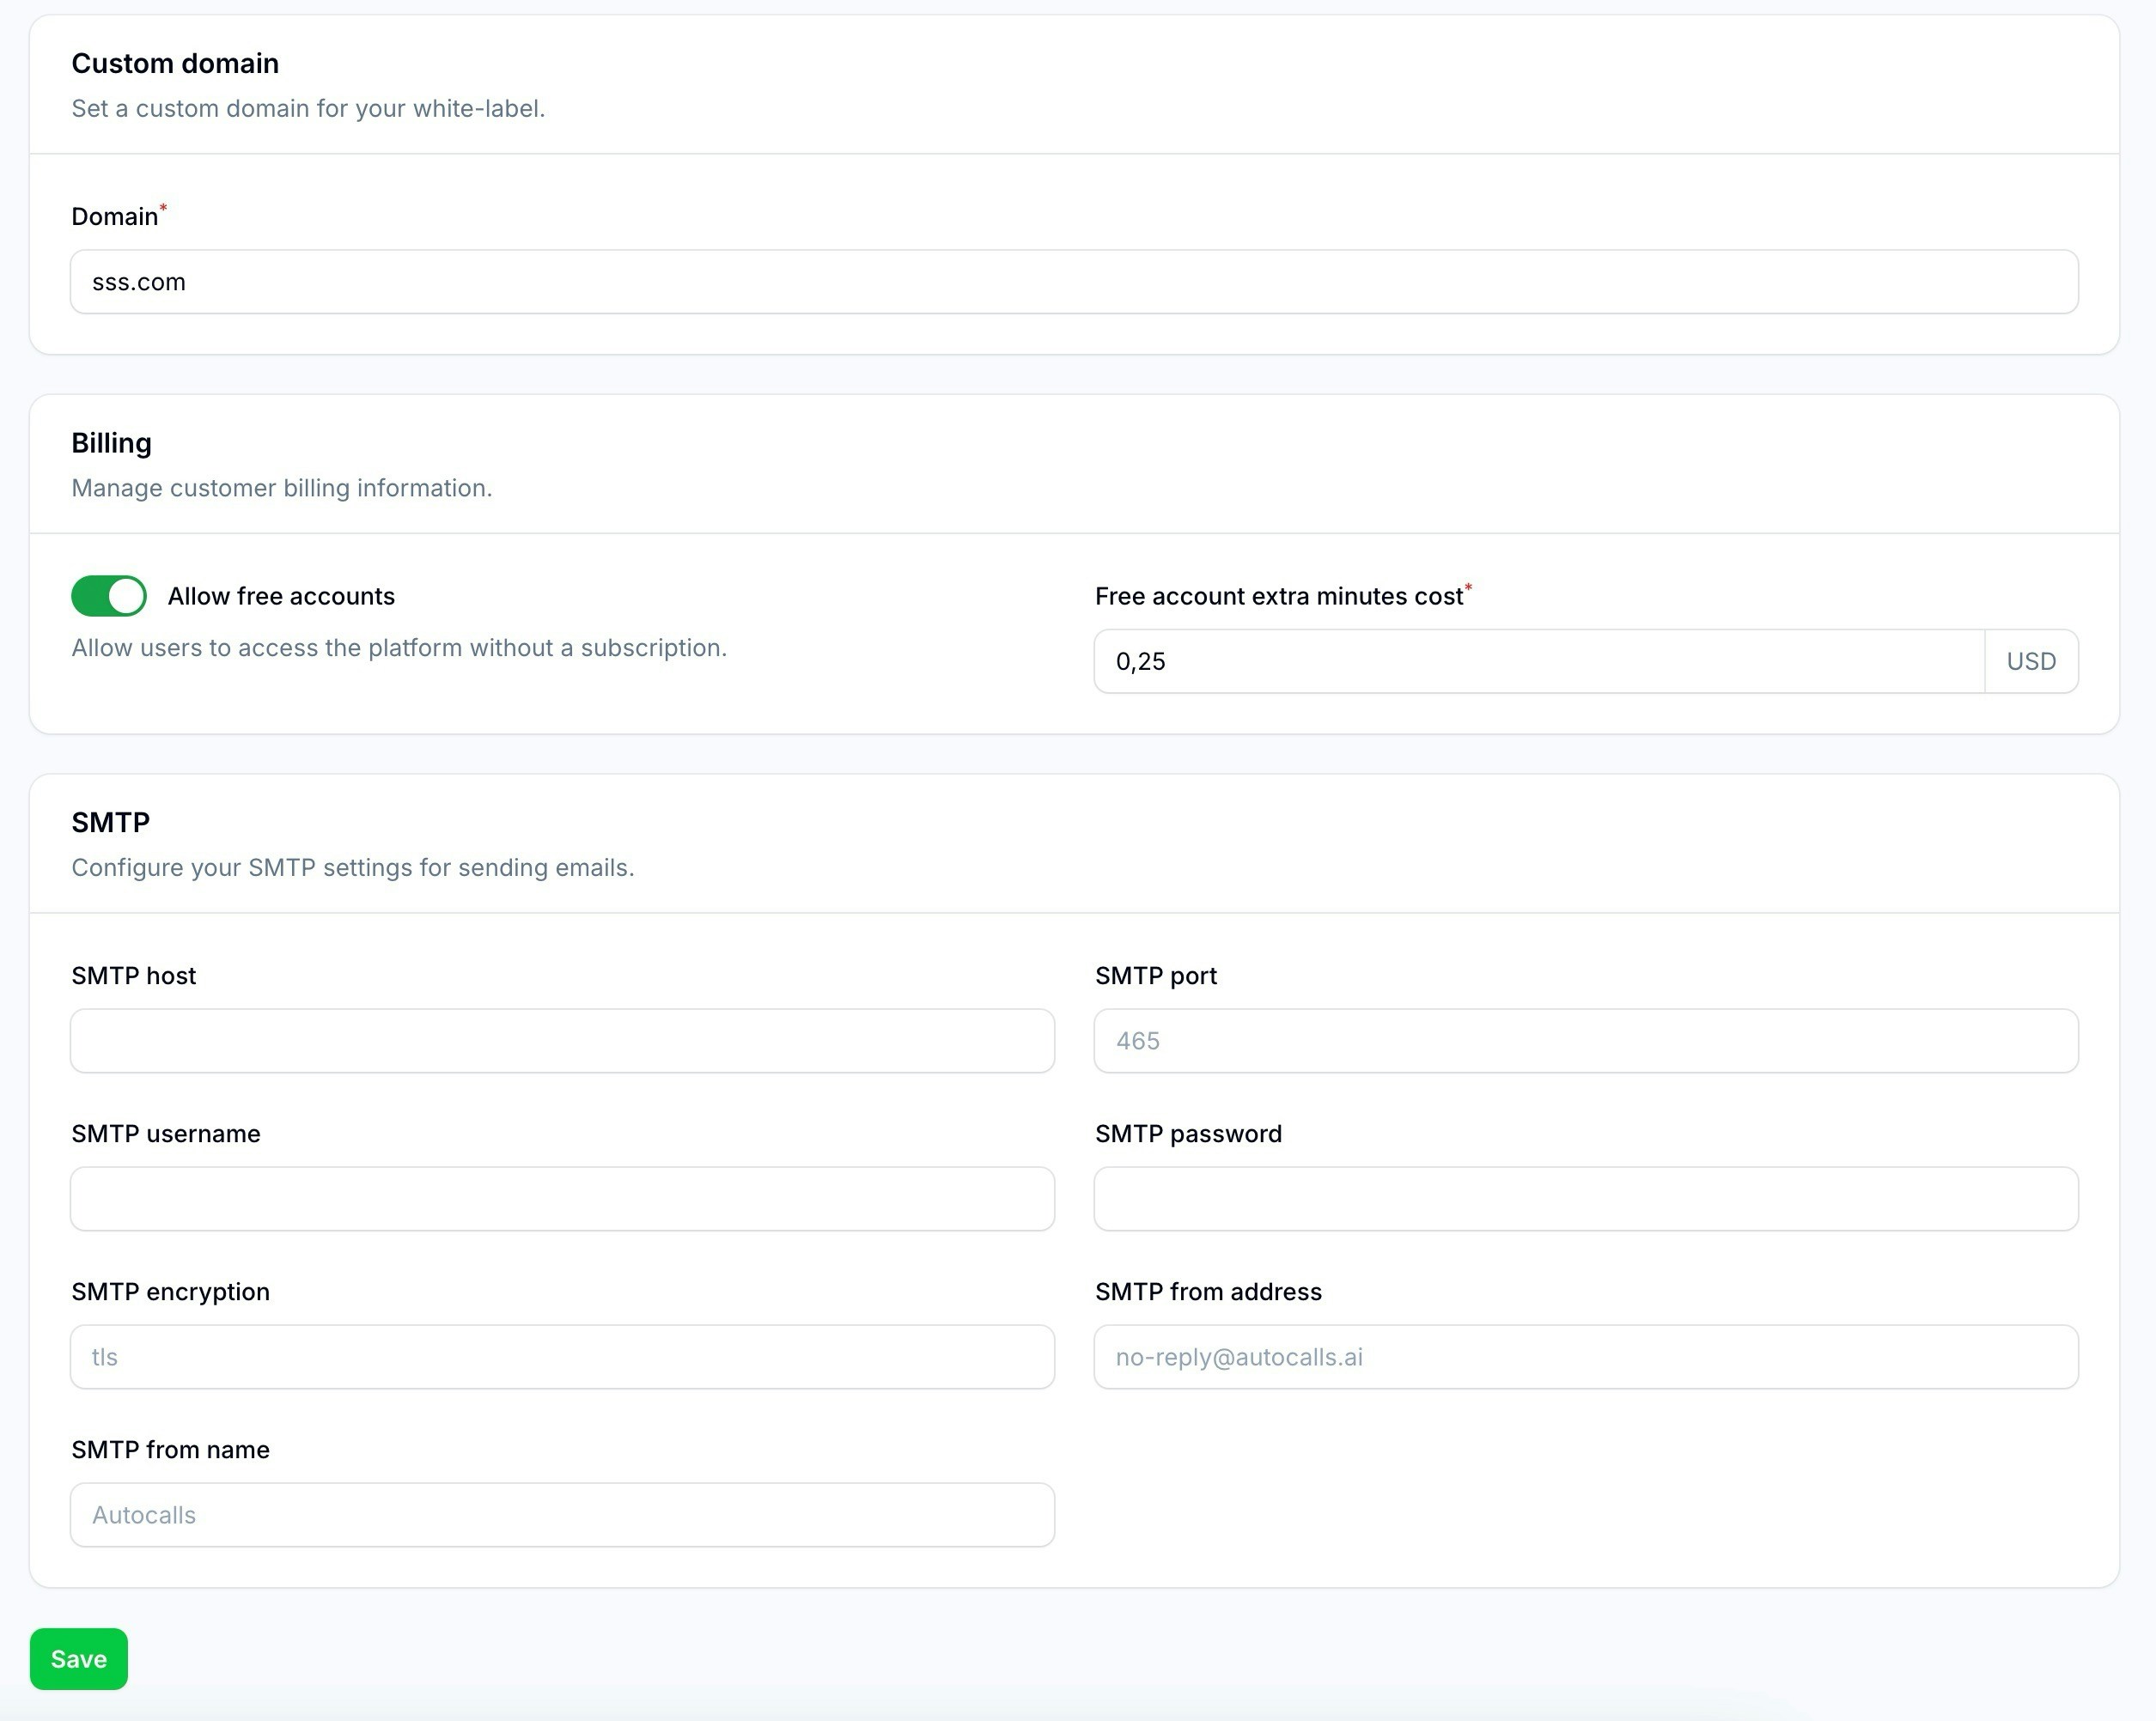
In the White Label Panel, you can customize:
* Platform name
* Brand colors
* Logo
* Domain settings
* Email templates
* Support contact information
2. Click to access white label settings
## 3. Configure Platform Settings
In the White Label Panel, you can customize:
* Platform name
* Brand colors
* Logo
* Domain settings
* Email templates
* Support contact information
 ## 4. Set Up Billing
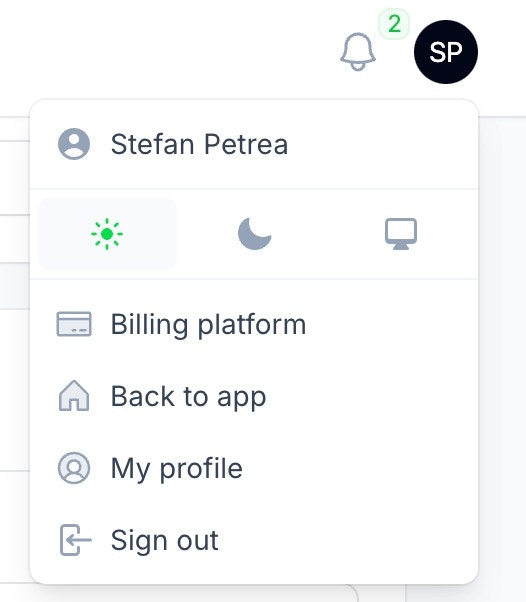
1. Click your user profile
2. Select "Billing platform"
## 4. Set Up Billing
1. Click your user profile
2. Select "Billing platform"
 3. Connect your Stripe account to start collecting payments
4. Configure payment settings
## 5. Domain Configuration
1. Choose your domain (e.g., app.yourbrand.com)
2. Add the provided DNS records to your domain
3. Wait for SSL certificate provisioning
4. Test domain access
## 6. Testing
Before launch:
1. Create a test account
2. Verify all branding elements
3. Test the signup process
4. Make test calls
5. Verify billing flow
## Next Steps
* [Configure your pricing plans](/white-label/plans-setup)
* Set up your support channels
* Prepare your marketing materials
***
**Need help?** Contact our support team for assistance with any step of the setup process.
3. Connect your Stripe account to start collecting payments
4. Configure payment settings
## 5. Domain Configuration
1. Choose your domain (e.g., app.yourbrand.com)
2. Add the provided DNS records to your domain
3. Wait for SSL certificate provisioning
4. Test domain access
## 6. Testing
Before launch:
1. Create a test account
2. Verify all branding elements
3. Test the signup process
4. Make test calls
5. Verify billing flow
## Next Steps
* [Configure your pricing plans](/white-label/plans-setup)
* Set up your support channels
* Prepare your marketing materials
***
**Need help?** Contact our support team for assistance with any step of the setup process.